Create Trading Model
Create Trading Model
The Create Trading Model page is the builder workspace inside My Trading Models.
It lets you assemble a Trading Model from the currently available backend components, run an M1 backtest, and save successful results back into your own workspace.
This workflow is currently available in Pro and Pro+. If your plan does not include custom Trading Models, or if you have already filled your saved-model allowance, darwintIQ shows the Trading Model access panel instead of the builder.
Builder workflow
The page is designed around a straightforward sequence:
- choose a model name and symbol
- start from one of the currently fit models on that symbol
- adjust the Entry Logic, Position Manager, and Filter
- tune or mutate the parameters
- queue an M1 backtest
- save the result if the fitness is positive
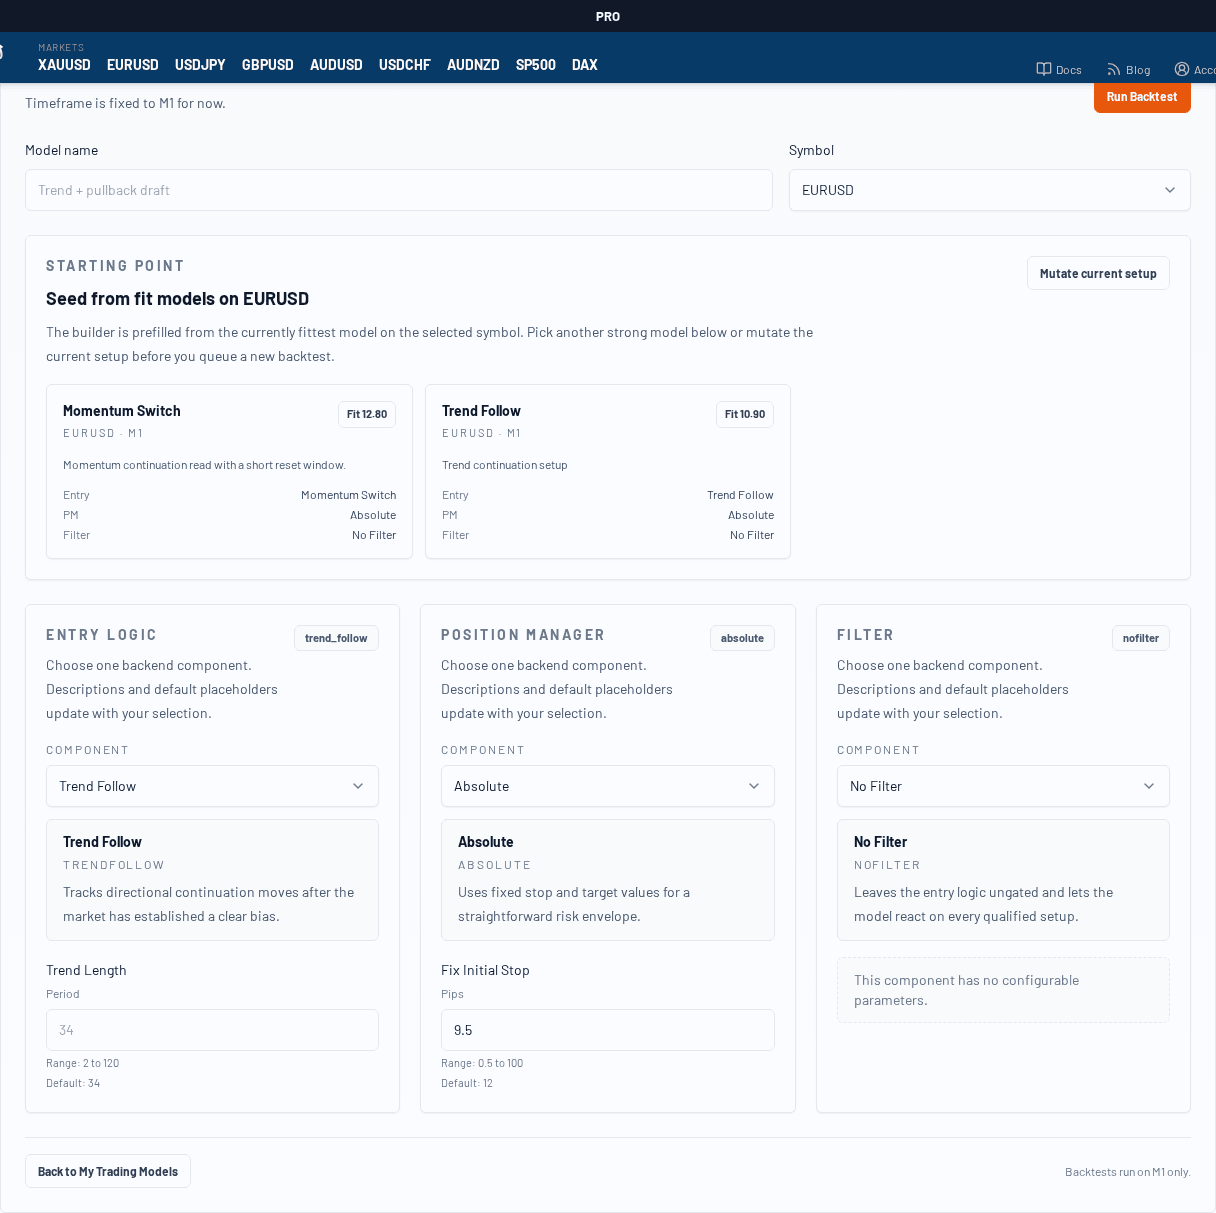
Step 1: Set the model name and symbol
At the top of the builder you define:
- the Model name
- the Symbol
The timeframe is currently fixed to M1, so there is no separate timeframe selector yet.
Step 2: Start from fit models
The builder is seeded from the strongest currently available Trading Models on the selected symbol.
That gives you a practical starting point instead of forcing you to build from a blank state every time.
You can:
- keep the currently seeded setup
- choose another fit model card as the starting point
- or mutate the current setup to create a nearby variation
Step 3: Configure the three building blocks
The main builder area is split into three sections:
- Entry Logic
- Position Manager
- Filter
Each section pulls from the live backend catalog and shows:
- the selected component
- a short description
- the available configurable parameters
- default values and ranges where available
This means the builder stays aligned with the actual backend components currently supported by darwintIQ.
If the backend catalog is empty, the builder does not fall back to invented options. Instead it tells you that active entry logic, position manager, and filter components need to exist in the backend first.
Step 4: Adjust parameters
Inside each section you can change the parameters exposed by the selected component.
Typical parameter inputs can include:
- numeric values with ranges
- booleans
- fixed option lists
If you want a quick variation, use Mutate current setup to change the mutable parameters automatically.
Step 5: Run the backtest
Once the setup looks right, click Run Backtest.
The builder then:
- queues a backtest
- polls the queue status
- updates the page when the result is done or failed
The page keeps the queue status visible so you can see whether the result is still waiting, running, finished, or failed.
Step 6: Save successful results
If the backtest completes with a positive fitness, a save dialog appears.
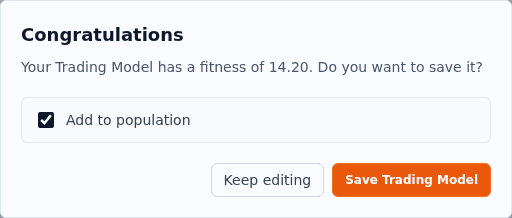
From there you can:
- save the Trading Model into My Trading Models
- decide whether it should also be added to the population
- return to editing instead of saving immediately
Only positive-fitness results can be saved. When the result is positive, the page first shows a Review save options prompt and then opens the save dialog.
Best practice
A practical workflow usually looks like this:
- start from the best seeded model on the symbol
- make one focused adjustment at a time
- run a backtest
- save only the variants that actually improve or remain strong
This keeps the workspace clean and makes it easier to compare which changes were genuinely useful.